


I am always on the look out for fun last minute DIY gifts and this cute light up Snowman Shadow Box was just perfect for a hand printed project. These cute shadow boxes are sold at my local Micheal's Store unpainted and unfinished. They are really easy to work with and each one can easily be personalized to suit your own esthetic. I used my new set of Folk Art Multi Surface paints (I have a Product Review if you want to learn more about these paints) by Plaid.
Before I go any further, I have to make the following notation: “As an Amazon Associate I earn from qualifying purchases” from links listed in this blog post. If you do not want to use my links, just do a search using your favorite search engine.
Supplies Needed:

1. Unfinished Snowman Artminds LED shadow box or any other of their cute boxes. The techniques are the same, you can just adjust to that particular box. These are found at the Michael's Craft Stores.

2. Folk Art Multi Surface Paints in Licorice, Real Brown, Classic Green, Pure Orange, Cardinal Red,
Wicker White and Folk Art Extreme Glitter Paint in Sliver.
3. Paint Brushes
4. White Glitter and optional Silver Glitter in larger chunks.
5. Clear Glue
6. Ranger Glossy Accents
7. Sheet of Glitter Paper
8. Batteries (size will vary with the box you purchase)

Step 1:
Open the package and remove the bottom of the shadow box, this will allow you to remove the inserts.

Step 2:
Sand all the pieces, being careful to not damage the lights or battery box. Paint the interior and exterior of the shadow box with the Wicker White paint. Use as many coats as you like until you get the finish you want. I used the Folk Art Multi Surface Paints which are fairly opaque so I only needed two coats.

Step 3:
Paint the trees in the front of the shadow box with the Folk Art Multi Surface paint in real brown. I also used the Wicker White for the snow flakes. Once the paint has dried, you can use the Folk Art Glitter paint in Silver to accent the snow flakes. After that has dried, use the clear glue to adhere the white glitter to the tree branches to make it look like it is snowing.

Step 4:
Once the front of the shadow box has dried, take the glitter sheet and measure it. Cut it to fit inside of the shadow box. Use the clear glue to adhere the glitter sheet to the shadow box. Make sure to cut it so that you can still see the lights when they are turned on.
Tip: If you are unable to purchase a glitter sheet of paper, you can just paint the interior back wall blue and add some blue glitter using the clear glue.
Step 5:
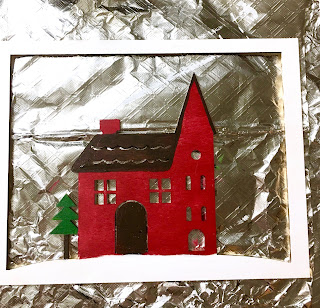
Using the multi surface paints, begin to paint the inserts. Allow to dry between coats.
 Step 6:
Use the Ranger Glossy Accents to add some dimension to the roof of the house. Allow to the Glossy Accents product to dry.

Step 7:
Use the Silver Glitter paint to accent the roof top and Pine Tree. If you want to really catch the light, then add a bit of chunky glitter to the areas you have painted with the glitter paint (before it dries).

Step 8:
Use the clear glue to adhere the white glitter to the snowman in the 2nd insert.

Then use the Folk Art Silver Glitter paint to add sparkle to the snowflakes. If you want to add even more sparkle, then just add a little chunky silver glitter to the painted surface before it dries.

Step 9:
Once all the parts have dried, re-assemble the box.

Step 10:
Add the batteries and enjoy the shadow box.

This was such a quick and easy project. It only took me two hours to finish the project. The cost of the shadow box itself was less than $10. I already had the Folk Art Multi Surface Paints and Folk Art Glitter Paint. You can find more ways to use the Folk Art paints at the Plaid website where they list all types of fun projects and tutorials. Michael's Craft stores have these cute shadow boxes for each season. I can't wait to see what they make available for Valentines day and Easter.
NOTE: I do not work for Plaid or Michael's Craft Store. They have not paid me for this review. I just really love their product lines and enjoy using various items in my craft projects and art work. I have included Amazon Associate links to Amazon but you do not need to use them. You can just do a search on google to find the closest retailer to you that carries these paints. As for the shadow boxes, you can find those each season at the Michael's Craft stores.
Supplies Needed:

1. Unfinished Snowman Artminds LED shadow box or any other of their cute boxes. The techniques are the same, you can just adjust to that particular box. These are found at the Michael's Craft Stores.

2. Folk Art Multi Surface Paints in Licorice, Real Brown, Classic Green, Pure Orange, Cardinal Red,
Wicker White and Folk Art Extreme Glitter Paint in Sliver.
3. Paint Brushes
4. White Glitter and optional Silver Glitter in larger chunks.
5. Clear Glue
6. Ranger Glossy Accents
7. Sheet of Glitter Paper
8. Batteries (size will vary with the box you purchase)

Step 1:
Open the package and remove the bottom of the shadow box, this will allow you to remove the inserts.

Step 2:
Sand all the pieces, being careful to not damage the lights or battery box. Paint the interior and exterior of the shadow box with the Wicker White paint. Use as many coats as you like until you get the finish you want. I used the Folk Art Multi Surface Paints which are fairly opaque so I only needed two coats.

Step 3:
Paint the trees in the front of the shadow box with the Folk Art Multi Surface paint in real brown. I also used the Wicker White for the snow flakes. Once the paint has dried, you can use the Folk Art Glitter paint in Silver to accent the snow flakes. After that has dried, use the clear glue to adhere the white glitter to the tree branches to make it look like it is snowing.

Step 4:
Once the front of the shadow box has dried, take the glitter sheet and measure it. Cut it to fit inside of the shadow box. Use the clear glue to adhere the glitter sheet to the shadow box. Make sure to cut it so that you can still see the lights when they are turned on.
Tip: If you are unable to purchase a glitter sheet of paper, you can just paint the interior back wall blue and add some blue glitter using the clear glue.

Step 5:
Using the multi surface paints, begin to paint the inserts. Allow to dry between coats.

Use the Ranger Glossy Accents to add some dimension to the roof of the house. Allow to the Glossy Accents product to dry.

Step 7:
Use the Silver Glitter paint to accent the roof top and Pine Tree. If you want to really catch the light, then add a bit of chunky glitter to the areas you have painted with the glitter paint (before it dries).

Step 8:
Use the clear glue to adhere the white glitter to the snowman in the 2nd insert.

Then use the Folk Art Silver Glitter paint to add sparkle to the snowflakes. If you want to add even more sparkle, then just add a little chunky silver glitter to the painted surface before it dries.

Once all the parts have dried, re-assemble the box.

Step 10:
Add the batteries and enjoy the shadow box.

This was such a quick and easy project. It only took me two hours to finish the project. The cost of the shadow box itself was less than $10. I already had the Folk Art Multi Surface Paints and Folk Art Glitter Paint. You can find more ways to use the Folk Art paints at the Plaid website where they list all types of fun projects and tutorials. Michael's Craft stores have these cute shadow boxes for each season. I can't wait to see what they make available for Valentines day and Easter.
NOTE: I do not work for Plaid or Michael's Craft Store. They have not paid me for this review. I just really love their product lines and enjoy using various items in my craft projects and art work. I have included Amazon Associate links to Amazon but you do not need to use them. You can just do a search on google to find the closest retailer to you that carries these paints. As for the shadow boxes, you can find those each season at the Michael's Craft stores.


